HVAC Chiller Installation Procedure
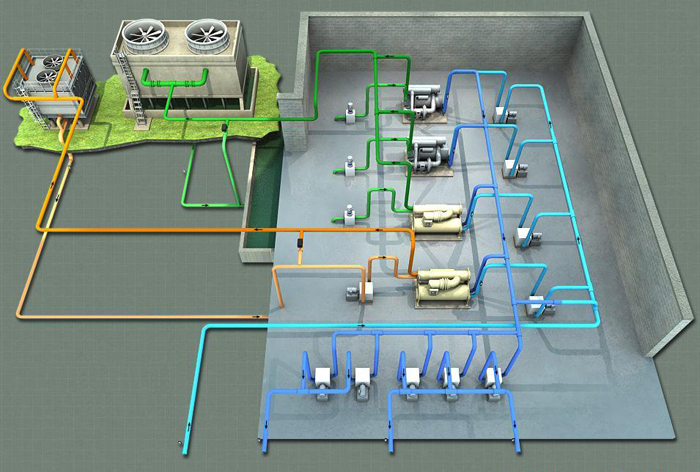
In this post we can learn about how to do the chiller installation in hvac system. The following documents are needed to install the chillers in hvac system
- Typical Installation Detail Drawing.
- Working drawings showing DCS Plant room.
- Chiller supplier’s installation manual..
We should prepare the following tools need to install the chillers.
They are
- Measuring Tape.
- Marking Pad / Ink.
- General Hand Tools.
- Impact Drill.
- Torch Lamp.
- Water Level.
- Winch.
- Hydraulic Jack.
- Protective Sheet
The following preparation work should be done
Check Chiller for the correct model and type when it arrives on site.
Examine Chiller's plinth size, location, and height in relation to the Plinth Layout and working drawings.
Check and double-check the type, size, and quantity of vibration isolators.
Check the clearance of the chiller delivery route from the ground level to the plant room.
Apply for clearance for a mobile crane and a low bay trailer at least one day before the actual lifting activities.
Safety is the one main thing in every work has to be done. we should keep eyes on safety work during chiller installation.
If necessary, barricade the affected work areas for safety.
Wear personal protective equipment (PPE) for your own safety and protection.
Before using mobile crane gear equipment, confirm the documentation.
Only qualified lifting supervisors, signallers, and riggers may command and control lifting operations.
Read Also: 200+ Piping Interview Questions and Answers
When all set to do the chiller installation, we should follow the below
HVAC Chiller Installation Procedure
1. Verify that the chiller orientation and alignment provided by the concrete plinth dimensions are consistent with the shop drawing.
2. Mark, drill, and install anchor bolts in the proper position for vibration isolators.
3. Verify that the vibration isolators' size and hole positions are correct.
4. Attach the Expansion Anchor Bolt to the inertia base using the Method Statement for "Expansion Anchor Bolt Installation."
5. Install chiller vibration isolators.
6. Slide the Chiller onto the Vibration Isolators.
7. Check the equipment level and make any necessary adjustments.
8. Connect all piping and other required components.
9.Connect the electrical supply wiring and the rest of the field control wiring system.
10. Place a protective sheet over the Chiller. Plywood covers are ideal for protecting corners from damage, especially when the Chiller is located along a common material/equipment delivery route.
11. After filling the water, check and adjust the level of the Chiller.
Once everything is done we need to check the chiller installation with its checklist provide by company
Pdf need
ReplyDeleteNeed PDF please
ReplyDelete